

Fall means soccer practice, school pickup lines, and weekend road trips, and by October the back of your front seats looks like a crime scene. Muddy cleats leave streaks, water bottles dent the upholstery, and the thin nylon organizer you bought last year is already sagging and ripped at the seams. A heavy-duty car seat organizer sewn from upholstery vinyl fixes all of that. It takes about one yard of fabric, one afternoon, and a few tricks for sewing a material that loves to stick to your machine.
Why Does Upholstery Vinyl Outlast Store-Bought Nylon Organizers?
Upholstery vinyl outlasts nylon organizers because it's built to handle commercial-level abuse. Most budget organizers use thin 300D to 600D polyester or nylon with light stitching, while vinyl is a solid, coated fabric made for seating that gets sat on, scraped, and scrubbed every day.
Here's the numbers side of it. Residential upholstery is considered heavy-duty at 15,000 double rubs on the Wyzenbeek abrasion test (a machine rubs cotton duck back and forth across the fabric until it wears). Many commercial vinyls are rated at 100,000 double rubs or more. That's roughly six times the heavy-duty threshold, which is why vinyl shows up on restaurant booths, school buses, and medical exam tables.
A kick mat takes the same kind of abuse. Kids kick the seat back with the toes of their shoes, and cleats concentrate all that force into a few small points. Vinyl's coated surface shrugs it off, and mud wipes away instead of soaking in. Honestly, once you've wiped dried clay off a vinyl pocket with one damp cloth, you won't go back to nylon.
Also, vinyl doesn't fray. You can leave cut edges raw, which cuts your sewing time down and removes the most common failure point on cheap organizers. If you want to browse options, start with the full vinyl upholstery fabric collection.
What Is the Best Fabric for a Car Seat Organizer?
The best fabric for a car seat organizer is a medium-weight upholstery vinyl or faux leather with a knit or woven backing. It resists abrasion, wipes clean, and holds its shape when the pockets are loaded.
You've got two good choices, and they're closer than you'd think:
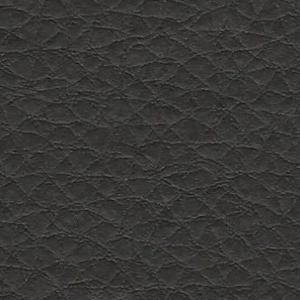
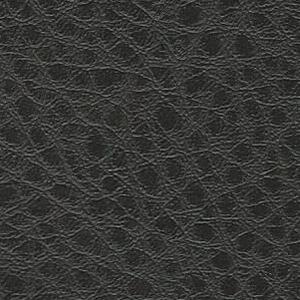
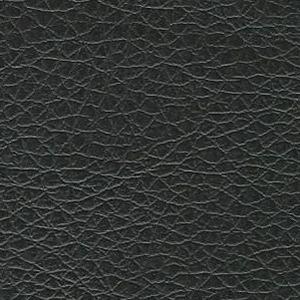
- Vinyl: The toughest and easiest to clean. It has a slightly smoother, plasticky feel and the highest abrasion ratings. Black is the smart pick since it hides scuffs and stains, and black vinyl upholstery fabric pairs well with almost any car interior.
- Faux leather: A softer hand and more realistic grain, usually a polyurethane coating. It still wipes clean and wears well, so choose it if you want the organizer to match leather seats. Browse the faux leather upholstery fabrics for grain and color options.
Skip anything stiff and crackly, and avoid very thick marine-grade vinyl with a heavy fabric backing. It's great for boat seats but fights your home sewing machine. Look for a fabric around 0.8 to 1.2 mm thick, which most household machines handle with the right needle.
How Much Vinyl Do You Need for a Car Seat Organizer and Kick Mat?
You need about one yard of 54-inch-wide upholstery vinyl for one organizer and kick mat. That covers the back panel, three pockets, and the strap tabs with a little left over for mistakes.
Here's the cut list for a standard front seat back. Measure your own seat first, since SUVs and compact cars differ.
- Back panel (kick mat): one piece, 18 inches wide by 26 inches tall
- Large shoe and gear pocket: one piece, 18 by 12 inches
- Bottle pockets: two pieces, 8 by 10 inches each
- Strap reinforcement patches: four pieces, 3 by 3 inches
- Top strap tabs: two pieces, 2 by 8 inches
You'll also need 1-inch polypropylene webbing (about 2 yards), two side-release buckles, one adjustable slide for the neck strap, heavy-duty polyester thread (size 69 or 92 bonded), a size 100/16 needle, a walking foot, and 10 or so sewing clips. A quick tip: save a scrap for test stitching. Always.
Photo by Annie Spratt on Unsplash
Step-by-Step Instructions
- Measure your seat and mark the vinyl. Measure the width and height of the seat back from headrest post to floor. Mark your cut list on the back of the vinyl with a fabric marker or chalk, never on the face, since marks can be stubborn.
- Cut the pieces cleanly. Use a rotary cutter and mat, or sharp shears, and cut in long, smooth strokes. Round the corners of the pockets and the main panel with a small plate or spool as a guide. Rounded corners resist peeling and look more finished.
- Set up your machine for vinyl. Install the 100/16 needle, switch to a walking foot, and lengthen your stitch to 3.5 to 4 mm. Shorter stitches perforate the vinyl like a postage stamp and can tear along the line. Loosen the presser foot pressure slightly if your machine allows it, then test on a scrap. If you don't own a walking foot, a Teflon or roller foot helps the vinyl glide instead of grab.
- Hem the pocket tops. Fold the top edge of each pocket piece down 1 inch toward the wrong side. Finger-press the fold and hold it with clips, not pins. Pins leave permanent holes in vinyl. Topstitch 1/4 inch from the folded edge, then add a second row 1/2 inch below for strength. Don't press with a hot iron, because vinyl melts fast. If you must, use low heat and a pressing cloth.
- Attach the pockets to the back panel. Line up the large pocket along the bottom edge of the panel, wrong sides together, with raw edges aligned. Clip around the sides and bottom. Sew 1/4 inch from the edge, then add a second row 1/8 inch inside the first. For the bottle pockets, place them on the large pocket's face, spaced evenly, and stitch the sides and bottom. Backstitch heavily at the top corners, since that's where bottles pull hardest.
- Divide the large pocket. Sew one vertical line down the center of the big pocket to make two compartments, one for shoes or cleats and one for books or snacks. Stitch slowly and don't tug the fabric. Let the feed dogs do the work, because pulling bends the needle.
- Reinforce the strap attachment points. Place a 3-inch vinyl patch on the back of each corner of the top edge and each bottom corner. Sandwich the webbing end between the patch and the panel, then sew a box with an X through the middle. This reinforced box-X stitch spreads load across a wider area so the straps don't tear out when you hang a loaded organizer. Attach the top neck strap with the adjustable slide, and add the buckles at the bottom to wrap around the seat base.
- Install and test. Hang the organizer over the front seat, adjust the neck strap until the panel sits snug against the seat back, and clip the bottom straps under the seat. Load the pockets with bottles, shoes, and a tablet. Tug hard on every strap. If anything shifts, add another row of stitching.
Need fabric for yours? Here are a few vinyl and faux leather options that fit this project well.

How Do You Clean a Vinyl Car Seat Organizer?
To clean a vinyl car seat organizer, wipe it with a damp cloth and a drop of mild dish soap, then dry it with a clean towel. Most mud, juice, and sneaker scuffs come off in under a minute.
For dried-on dirt, let a warm, damp cloth sit on the spot for 30 seconds before wiping. Avoid bleach, rubbing alcohol, and abrasive scrubbers, since they can dull or crack the coating over time. Sunscreen and hand sanitizer are the sneaky culprits in summer-to-fall transition months, so wipe those off promptly. A quick wipe every week or two keeps the finish supple and stops grime from settling into the grain.
Unlike nylon, you never need to pull the organizer out and throw it in the wash. That's a real win when a juice box explodes at 7:45 on a Tuesday morning.
Tips for Sewing Vinyl Without the Headaches
- Use clips, not pins. Every pin hole stays forever, so hold layers together with sewing clips or a little double-sided basting tape in the seam allowance.
- Try the tissue paper trick. If the vinyl still sticks to the presser foot, lay a strip of tissue paper over the seam and tear it off after stitching. A dab of sewing machine oil on a Teflon foot helps too.
- Don't backstitch more than once. Too many stitches in one spot perforate the vinyl and create a weak line. Two or three stitches at stress points is plenty.
- Choose the right thread. Bonded polyester thread resists UV and abrasion, which matters in a hot car. Cotton thread rots and snaps.
- Save your scraps. Leftover vinyl makes great coasters, key fobs, and extra patches. Keep an eye on the upholstery fabric sale page if you want to stock up for gifts, since this project is a crowd-pleaser at a team or carpool.
- Size up for big kids. Teens kick harder. Add a second layer of vinyl behind the kick mat area for extra cushioning.
Frequently Asked Questions
Q: Can you sew vinyl on a regular home sewing machine?
Yes, you can sew upholstery vinyl on a regular home machine if you use a walking foot or Teflon foot, a 100/16 needle, and a stitch length of 3.5 to 4 mm. Use clips instead of pins and test on a scrap before sewing your project.
Q: How much vinyl fabric do I need for a car seat organizer?
You need about one yard of 54-inch-wide vinyl for one back-of-seat organizer with a kick mat, three pockets, and strap reinforcements. If you're making two organizers for both front seats, buy two yards so you have room for matching cuts.
Q: Is vinyl or faux leather better for a car seat kick mat?
Vinyl is better for a kick mat because it typically has higher abrasion ratings, often 100,000 double rubs or more, and it's the easiest to wipe clean. Faux leather works well too and feels softer, so pick it if you want the organizer to match leather seats.