

If you've ever watched a canvas tool roll go stiff, cracked, and grease-stained after one winter in the garage, you already know why upholstery-weight vinyl is worth a second look. A tool roll or workshop apron sewn from upholstery vinyl or vinyl-backed fabric shrugs off grease, sawdust, and sharp tool edges in a way canvas simply can't, and it wipes clean with a damp rag instead of needing a wash cycle it may not survive. This guide walks through why the material matters, how much yardage you'll actually need, and the exact steps to sew a roll or apron that holds up for years, not months.
Why Does Upholstery Vinyl Beat Canvas for Shop Aprons and Tool Rolls?
Upholstery vinyl beats canvas because it's non-porous, resists puncture from tool tips, and is rated for tens of thousands of abrasion cycles that plain cotton canvas was never tested for. Canvas is a woven natural fiber, so grease and oil soak straight into the threads and break them down over time. Vinyl sits on top of the surface instead of absorbing into it.
Here's a fact worth remembering: most upholstery-grade vinyl carries a Wyzenbeek double rub rating between 100,000 and 250,000 cycles, while untreated cotton duck canvas is rarely rated at all because it's not built for the same abrasion standard. Anything rated above 30,000 double rubs is considered heavy-duty for residential furniture use. A workshop apron gets far more friction and impact than a sofa cushion ever will, so building it from a fabric already engineered to survive high-traffic upholstery is just common sense.
Photo by The New York Public Library on Unsplash
What Fabric Weight Do You Need for a Tool Roll?
You want a marine-grade or upholstery-weight vinyl between 18 and 24 ounces per linear yard, ideally with a woven scrim backing for tear resistance. Lighter vinyl, like the stuff used for tablecloths or light upholstery, will crack at fold lines within a season of daily use.
Scrim backing matters more than people expect. That thin woven layer bonded to the underside of the vinyl is what keeps a fold from turning into a split. If you're shopping, ask specifically for scrim-backed or "commercial grade" vinyl rather than decorative vinyl meant for accent chairs. It costs a little more, but it's the difference between a tool roll that survives five years and one that needs replacing every winter.
Canvas vs Vinyl: A Quick Head-to-Head
Both materials have a place in a workshop, but they solve different problems. Here's how they stack up:
- Grease and oil resistance: Vinyl wipes clean. Canvas stains and eventually stiffens.
- Abrasion life: Vinyl upholstery fabric is typically tested to 100,000+ double rubs. Canvas has no standard industry abrasion rating.
- Sharp tool resistance: Vinyl with scrim backing resists chisel and screwdriver punctures better than plain woven canvas.
- Breathability: Canvas breathes better, which matters if you're wearing an apron in a hot shop all day.
- Sewability: Canvas is easier for beginners to sew with a home machine. Vinyl needs a walking foot and a slightly heavier needle.
- Cost: Canvas is cheaper per yard, but you'll likely replace it two or three times before a single vinyl apron wears out.
Our take: if the project touches grease, metal shavings, or anything with a sharp edge, vinyl wins. If you just need a lightweight garden apron, canvas is fine.
Step-by-Step Instructions
This pattern works for either a roll-up tool roll (about 18 by 24 inches unrolled) or a full bib-style workshop apron with pockets. Adjust pocket count and placement to fit your own tool collection.
- Choose your fabric weight. Pick an upholstery-weight vinyl or vinyl-backed fabric rated for heavy-duty use, ideally with scrim backing. For a tool roll, budget 3/4 to 1 yard of 54-inch-wide fabric. For a full apron with bib and pockets, budget 1.5 to 2 yards.
- Cut the base panel first. For a tool roll, cut one rectangle roughly 18 by 30 inches for the body, plus a separate strip for the pocket panel. For an apron, cut the main body piece to your torso length plus 4 inches for hems, and cut a separate bib piece if your design has one.
- Cut pocket strips on the straight grain. Vinyl doesn't fray, so grain direction matters less for durability, but keeping pocket strips straight makes stitching pleats and dividers much easier.
- Pin instead of using regular sewing clips when possible, or use binder clips. Standard pins leave permanent holes in vinyl, so use clips along seam edges and only pin within the seam allowance that will be trimmed or hidden.
- Sew pocket pleats before attaching the pocket panel. Fold small box pleats every 3 to 4 inches along the bottom of your pocket strip so pockets can expand around chisels, screwdrivers, or a cordless drill without straining the stitching.
- Topstitch the pocket panel to the base using a walking foot. A walking foot feeds vinyl evenly through the machine so layers don't shift or pucker. Stitch vertical pocket dividers first, then stitch the bottom and sides of the whole panel.
- Reinforce every pocket top corner with a bar tack. This is where tools pull hardest and where seams fail first. A few extra reverse stitches or a bar tack setting here adds years of life.
- Add ties, straps, or hook-and-loop closures. For a roll, sew two long fabric ties or a single strap and buckle at one end so the whole thing cinches shut. For an apron, attach webbing straps at the neck and waist with double-stitched box seams for strength.
- Finish raw edges with double-fold binding or a wide topstitch. Vinyl won't fray, but a clean folded edge looks sharper and protects the cut edge from repeated flexing.
For color and finish, a lot of homeowners default to black or brown for the obvious reason that grease doesn't show. If you want a workshop apron that still looks presentable when you answer the door mid-project, browsing black upholstery vinyl or brown upholstery fabric options is a good place to start.
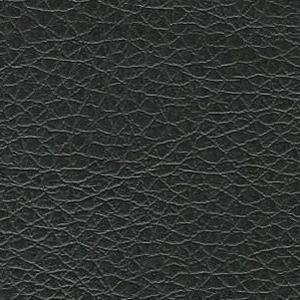

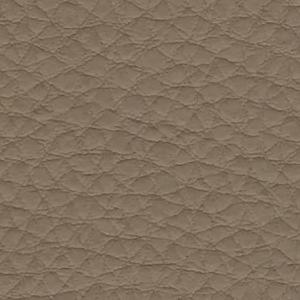
If you'd rather see the full range before deciding, the complete vinyl upholstery fabric collection includes marine-grade options built specifically for wipeable, high-abrasion use. Solid colors tend to work best for this kind of project since patterns don't do much for you once a tool roll is covered in sawdust anyway, so the solid upholstery fabric selection is worth a look too.

Photo by Caden Norcott on Unsplash
Tips for a Tool Roll or Apron That Lasts
- Pre-crease fold lines with a bone folder instead of an iron. Vinyl melts under high heat, so skip the iron entirely on this project.
- Use a longer stitch length, around 3.0 to 3.5mm, since a short stitch length perforates vinyl like a row of tear-off tickets.
- Test your needle and thread on a scrap first. A size 90/14 or 100/16 needle with heavy-duty polyester thread handles most upholstery vinyl without skipped stitches.
- Wipe grease and dust off after every use with a damp cloth. Because vinyl doesn't absorb oils, most stains lift right off instead of setting in.
- Skip fusible interfacing. Vinyl already has enough body on its own, and heat-activated adhesives can bubble the surface.
Frequently Asked Questions
Q: How much vinyl fabric do I need to sew a tool roll?
A basic roll-up tool roll needs about 3/4 to 1 yard of 54-inch-wide upholstery vinyl, including enough for the pocket panel and ties. A larger roll with 10 or more tool pockets may need closer to 1.5 yards.
Q: Is vinyl fabric hard to sew on a regular home sewing machine?
Vinyl is manageable on most home machines if you use a walking foot, a heavier needle, and clips instead of pins along the seams. Regular pins leave permanent holes, and a standard presser foot can cause the fabric layers to slip or pucker during stitching.
Q: Why is vinyl more durable than canvas for a workshop apron?
Upholstery vinyl is non-porous and typically rated for 100,000 or more Wyzenbeek double rubs, while cotton canvas absorbs grease and oil and has no comparable industry abrasion rating. That means vinyl resists staining, cracking, and puncture damage far longer under daily shop use.