

If you've got a bin of upholstery fabric scraps sitting in your sewing room, you're probably staring at more than a few square feet left over from a chair or ottoman project. Instead of tossing them, sew durable book, journal, and planner covers with them. This is one of the best uses for upholstery fabric scraps because most tutorials online tell you to use thin quilting cotton, and honestly, that stuff just doesn't hold up. Upholstery-weight vinyl or woven fabric gives you a stiffer, book-safe wrap that survives daily handling, backpacks, and the occasional coffee spill without fraying at the corners in a month.
Why Does Upholstery Fabric Beat Quilting Cotton for Book Covers?
Upholstery fabric is built to survive years of sitting, sliding, and scrubbing, while quilting cotton is designed to hang on a wall or lie flat on a bed. A book cover gets handled constantly, so it needs the same abrasion resistance as a sofa cushion, not a quilt square.
Here's the number that matters: most upholstery-grade vinyl and tightly woven fabric passes 30,000 or more cycles on the Martindale abrasion test, and heavy-duty options are often rated at 15,000 double rubs or higher using the Wyzenbeek method. Quilting cotton typically isn't tested for abrasion resistance at all, because nobody expected it to survive a backpack. That's why a planner cover made from a leftover chair fabric can take years of zippers, keys, and pet claws without pilling or splitting at the spine fold.

Photo by engin akyurt on Unsplash
What's the Best Upholstery Fabric for a DIY Book Cover?
Heavyweight vinyl and tightly woven upholstery fabric make the best book covers because they hold a crease without fraying and wipe clean instead of soaking up spills. Chenille and boucle look gorgeous but tend to shed at cut edges unless you finish them carefully, so save those for covers you plan to line generously.
Vinyl is basically the cheat code here. It doesn't fray at all, so you skip a whole finishing step, and it wipes clean with a damp cloth, which matters a lot if this cover is going in a kid's backpack or riding around in a diaper bag. If you want something with more texture, a plain woven fabric with a tight weave structure gives you similar durability with a softer hand. Either way, skip anything under a mid-weight designation. Thin decorator fabrics and drapery-weight cottons just don't have the tooth to survive repeated folding at the spine.
Step-by-Step Instructions
- Measure your book or planner. Open it flat and measure height, width, and spine thickness. Add 1.5 inches on all sides for wrap-around flaps and seam allowance.
- Cut your fabric and stabilizer. Cut one piece of upholstery fabric to your measurements, plus a piece of heavyweight fusible interfacing or thin craft board the same size minus a half inch on each edge. This is what gives the cover its stiff, book-safe structure.
- Fuse or glue the stabilizer to the wrong side. If you're using vinyl, skip the iron (heat can melt it) and use fabric glue or double-sided fusible tape instead. Woven fabric can take a low-heat iron with a pressing cloth.
- Reinforce the corners. This is the step most tutorials skip. Cut small triangles of extra fabric or interfacing and fuse them diagonally over each corner before you fold anything. Corners take the most abuse on a daily-carry cover, and a double layer here prevents the classic frayed-corner look after a few months of use.
- Fold and stitch the inside flaps. Fold each short end in by about 3 inches, wrong sides together, to create the pockets that hold the book covers. Pin, then topstitch along the top and bottom edges using a heavy-duty needle rated for vinyl or upholstery fabric.
- Add your closure. Sew in an elastic band, a snap, or a fabric tie between the flap and the outer cover before your final topstitch. Elastic corner loops work great for planners you'll open and close daily, while a simple tie feels more like a journal.
- Topstitch the entire perimeter. Go around the whole cover twice if your machine allows it. This locks the flap pockets in place and adds a third layer of reinforcement right where the spine will flex thousands of times over the cover's life.
- Slide your book in and test the fold. Insert the front and back covers into the flap pockets, then open and close it a few times to make sure the spine crease sits where you want it. Adjust the flap depth now if it's too loose.

Corner Reinforcement Tips That Actually Work
- Double up your interfacing at stress points. A single layer of fusible stabilizer is fine for the flat panels, but corners and the spine fold need two layers minimum.
- Use a walking foot when topstitching vinyl or thick woven fabric. It feeds both layers evenly so you don't end up with puckering at the corners.
- Round the corners slightly instead of leaving them sharp. A gentle curve resists fraying and catching on backpack zippers far better than a 90-degree point.
- Skip pins on vinyl. Binder clips or fabric weights hold seams in place without leaving permanent pinholes.
Honestly, corner reinforcement is the single biggest reason handmade book covers fail early. Skip it and you'll be patching frayed corners within a season, no matter how nice the fabric looked on day one.
Which Scraps Should You Save for This Project?
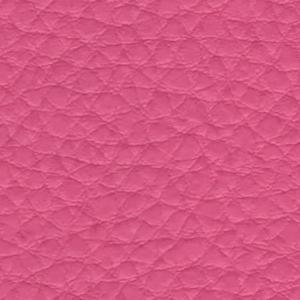
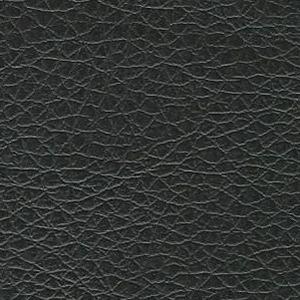
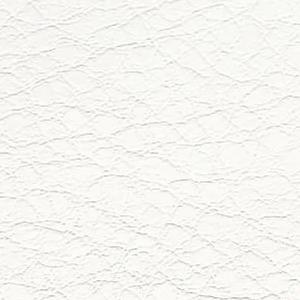
Save any upholstery-weight remnant larger than a placemat. Vinyl scraps are the most forgiving for beginners because the edges never fray, which is why leftover pieces from a project using black vinyl upholstery fabric or brown vinyl upholstery fabric make excellent first-attempt covers. If you prefer a fabric hand over a wipeable surface, a scrap from the woven upholstery fabric collection holds its shape nicely once backed with interfacing.
Chenille lovers, don't count yourselves out. A remnant from the grey upholstery fabric range or any tightly-napped chenille works beautifully for a softer-feeling journal cover, as long as you seal the raw edges with a zigzag stitch or fray-check before assembly. And if your scrap bin is looking thin, browse the upholstery fabric sale section for remnant-friendly yardage that's already discounted, perfect for a project that only needs half a yard.
Photo by Ksenia Pixelesse on Unsplash
Frequently Asked Questions
Q: Can I use quilting cotton for a book cover instead of upholstery fabric?
You can, but it won't hold up as well. Quilting cotton isn't rated for abrasion resistance and tends to fray and thin out at the spine fold within a few months of daily handling, while upholstery-grade fabric rated for 15,000 double rubs or more is built for exactly that kind of repeated stress.
Q: How much fabric do I need to make one book cover?
Most standard journal or planner covers need about a half yard of upholstery fabric, plus a matching piece of interfacing or craft board. A single chair-seat scrap or ottoman remnant is usually more than enough for two or three covers.
Q: Does vinyl upholstery fabric work for a sewing machine, or do I need special tools?
Standard home sewing machines handle vinyl fine as long as you swap to a heavier needle designed for vinyl or leather and use a walking foot to prevent the layers from sticking or slipping. A Teflon presser foot also helps if your machine tends to drag on smooth vinyl surfaces.